


For detailed information, other images and documents, please select individual articles from the following table.


Chemical injection mortar Basic WIT-PM 200
Base mortar for masonry and uncracked concrete

Register now and access more than 125,000 products


Variants
Register now and access more than 125,000 products
- Two-component reactive resin mortar, styrene-free polyester
- Individual fixing point for uncracked concrete:
W-VI-A anchor rod, W-VD-A anchor rod, standard threaded rod with acceptance test certificate 3.1
- Individual fixing point for masonry (system with SH perforated sleeve):
W-VI-A anchor rod, standard threaded rod with acceptance test certificate 3.1, SH perforated sleeve
- European Technical Assessment ETA-12/0569: Individual fixing point + uncracked concrete (W-VI-A anchor rod, W-VD-A anchor rod, standard threaded rod with acceptance test certificate 3.1)
- European Technical Assessment ETA-13/0037: Individual fixing point + masonry (W-VI-A anchor rod, 3.1 standard threaded rod, SH perforated sleeve, autoclaved aerated concrete only without perforated sleeve)
- EPD: Environmental product declaration in accordance with ISO 14025 and EN 15804 + A2, EPD-AWU-20230415-CBA2
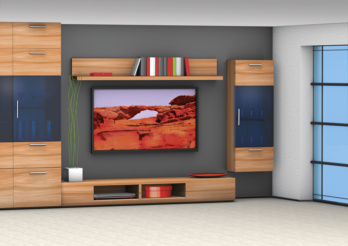 Wall units
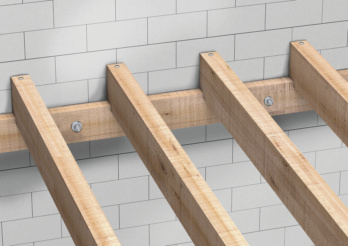 Wooden structures
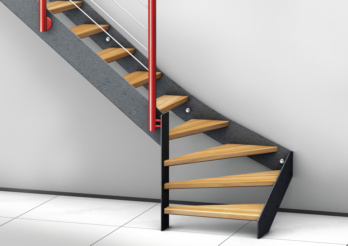 Stairs
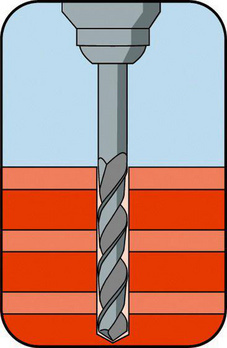
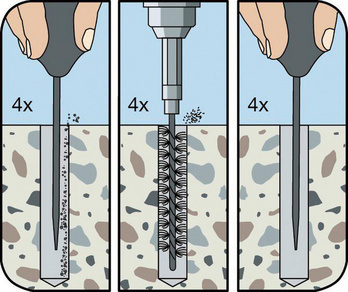
Drill holes with a rotary drill (without impact mechanism)
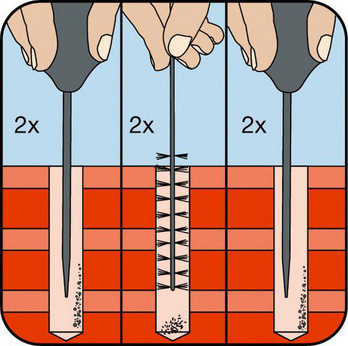
Clean drill hole; 2x blow out/2x brush out/2x blow out
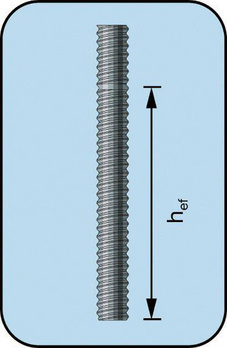
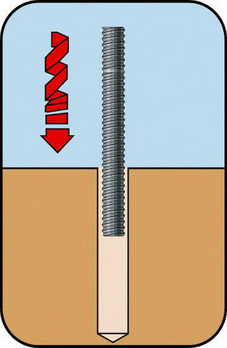
Cut anchor rod to length and mark the desired insertion depths
Insert perforated sleeve
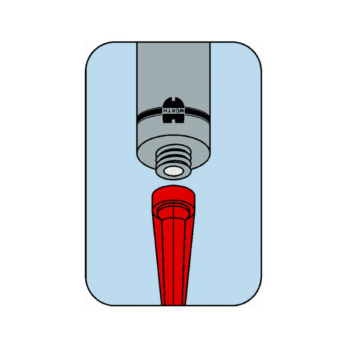
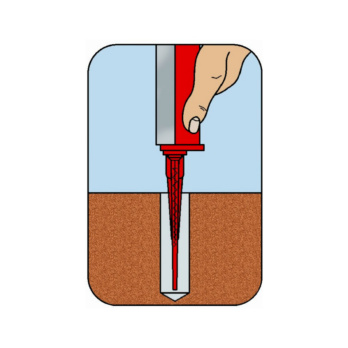
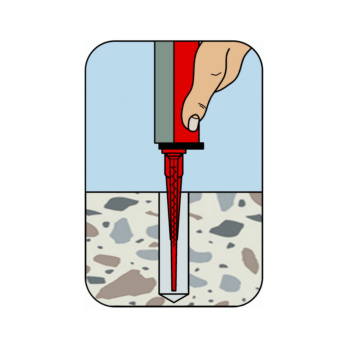
Screw mixer onto cartridge
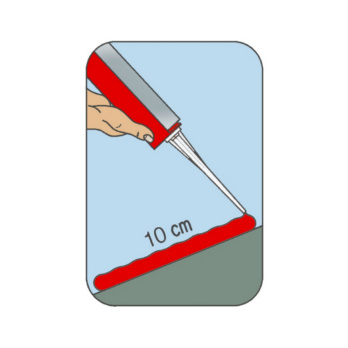
Discard the first section of mortar (until the mortar is uniformly coloured - approx. 10 cm)
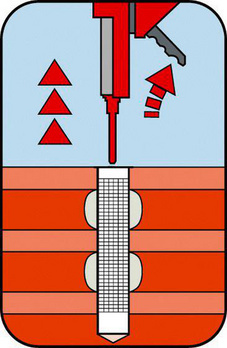
Completely fill with composite mortar from end of perforated sleeve
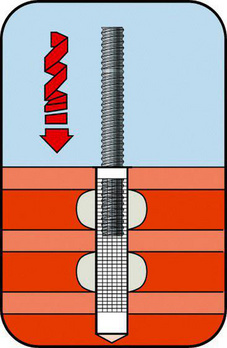
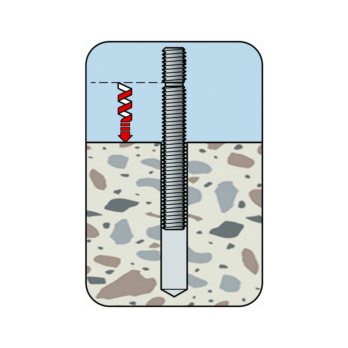
Press in anchor rod up to the bottom of the sleeve while turning slightly
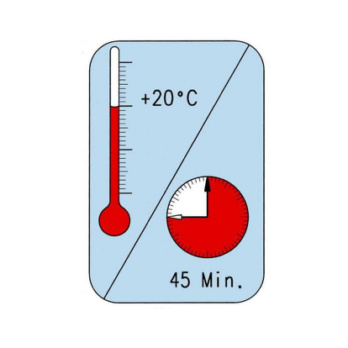
Observe the injection mortar curing time
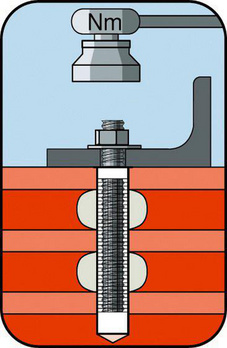
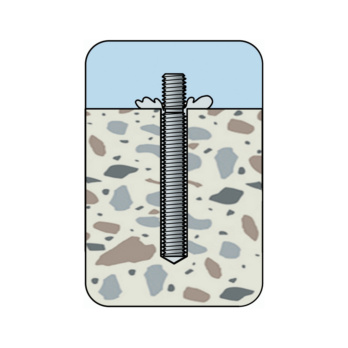
Mount component; do not exceed maximum torque
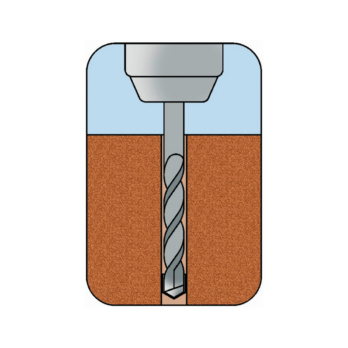
Create the drill hole
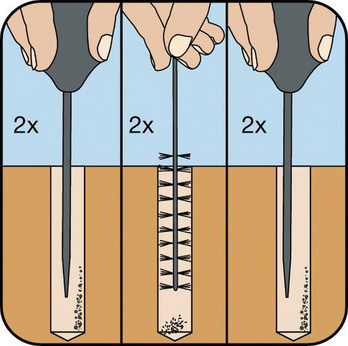
Clean drill hole; 2x blow out/2x brush out/2x blow out
Cut anchor rod to length and mark the desired insertion depths
Screw mixer onto cartridge
Discard the first section of mortar (until the mortar is uniformly coloured - approx. 10 cm)
Fill with composite mortar starting from the bottom of the drill hole (see enclosed leaflet)
Press in anchor rod up to the bottom of the sleeve while turning slightly
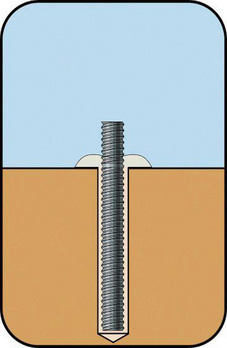
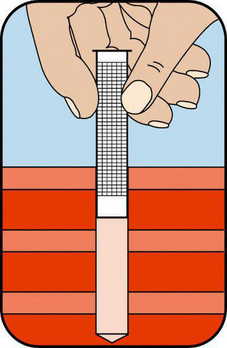
Visual check of mortar volume, embedment depth mark
Observe the injection mortar curing time
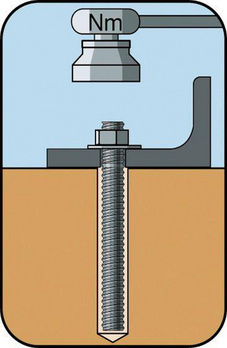
Mount component; do not exceed maximum torque
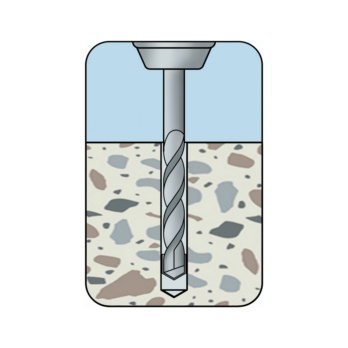
Create the drill hole
Clean drill hole; 2x blow out/2x brush out/2x blow out
Cut anchor rod to length and mark the desired insertion depths
Screw mixer onto cartridge
Discard the first section of mortar (until the mortar is uniformly coloured - approx. 10 cm)
Fill composite mortar from bottom of drill hole
Press in anchoring element up to drill hole base while turning slightly
Visual check of mortar volume, embedment depth mark
Observe the injection mortar curing time
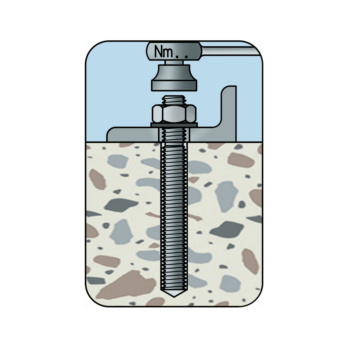
Mount the component. Do not exceed the maximum torque
- European Technical Assessment ETA-12/0569: Individual fixing point + uncracked concrete (W-VI-A anchor rod, W-VD-A anchor rod, standard threaded rod with acceptance test certificate 3.1)
- European Technical Assessment ETA-13/0037: Individual fixing point + masonry (W-VI-A anchor rod, 3.1 standard threaded rod, SH perforated sleeve, autoclaved aerated concrete only without perforated sleeve)
- EPD: Environmental product declaration in accordance with ISO 14025 and EN 15804 + A2, EPD-AWU-20230415-CBA2
- Attachment in uncracked concrete, solid and perforated brick masonry, aerated concrete
- Suitable for attaching wooden structures, metal structures, metal profiles, brackets, grilles, sanitary ware, pipes, cable conduits, etc.
Select RAL-colour code
!! NOTE: On-screen visualisation of the colour differs from real colour shade!!